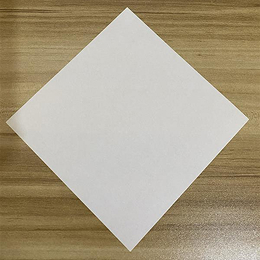
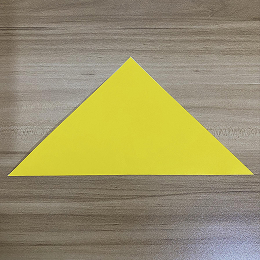
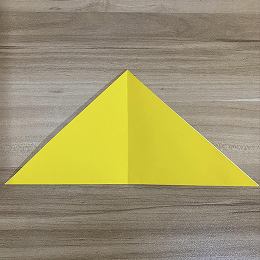
Start with the white side of the paper facing up, and fold it in half diagonally.
紙の白い面を上にして置き、対角線で半分に折ります。
Start with the white side of the paper facing up, and fold it in half diagonally.
紙の白い面を上にして置き、対角線で半分に折ります。
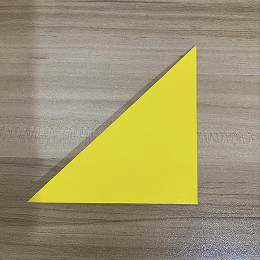
Fold the right corner to the left corner diagonally, crease well, then unfold.
右の角を左の角に向かって対角線に折り、しっかり折り目をつけてから戻します。
Take the right corner, fold it to the left along the dotted line, making sure it goes over the middle crease and under the bottom edge. The more folds you make, the smaller the chick’s face will be.
右の角を取り、点線に沿って左に折ります。中央の折り目の上を通り、下の端の下にくるように注意してください。折り重ねる回数が多いほど、ひよこの顔は小さくなります。
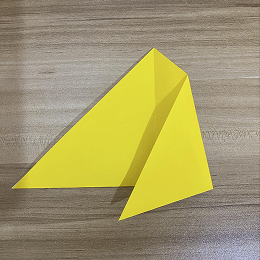
Repeat this for the left corner.
左の角でも同じように折ります。
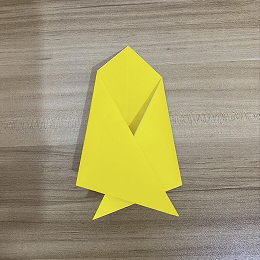
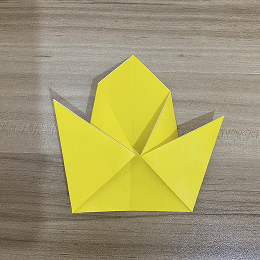
Take the left top flap, and fold it up along the dotted line.
左上のフラップを取り、点線に沿って上に折ります。
Repeat this for the right top flap.
右上のフラップでも同じように折ります。
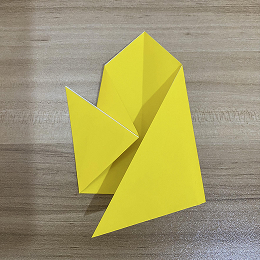
Then fold the bottom left and right corners up slightly to form the chick’s cheeks.
次に、下の左と右の角を少し上に折り、ひよこのほっぺを作ります。
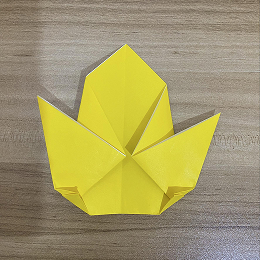
Fold the top point down slightly as well to form the forehead.
上の先端も少し下に折って、ひよこのおでこを作ります。
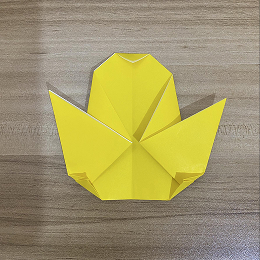
Flip the paper over.
紙を裏返します。
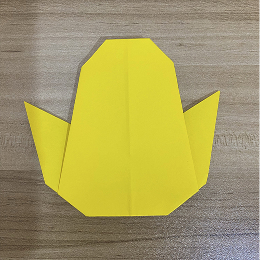
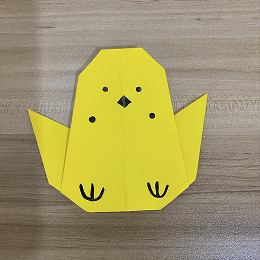
Use your imagination to draw the mouth, eyes, or other expressions for the chick.
ひよこの口や目、表情を想像して描いてみましょう。
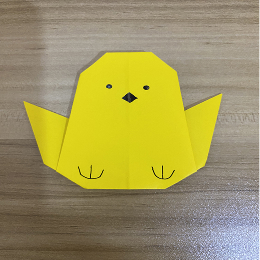
Finally, you’re done.
ついに完成です。