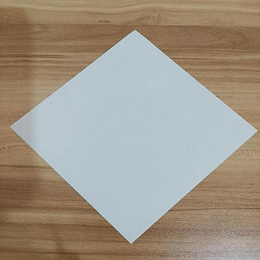
Start with a square piece of origami paper. If you only have a regular 8.5 × 11-inch sheet of paper, follow these instructions to make a square sheet.
正方形の折り紙から始めます。もし普通の8.5×11インチの紙しかない場合は、正方形の紙を作るためにこの手順に従ってください。
Start with a square piece of origami paper. If you only have a regular 8.5 × 11-inch sheet of paper, follow these instructions to make a square sheet.
正方形の折り紙から始めます。もし普通の8.5×11インチの紙しかない場合は、正方形の紙を作るためにこの手順に従ってください。
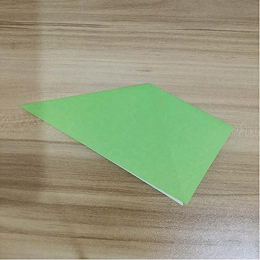
Fold the paper in half from the top corner to the bottom corner.
紙を上の角から下の角に向かって半分に折ります。
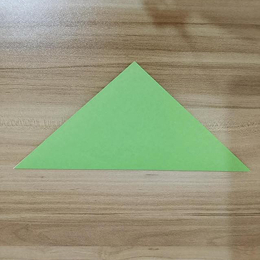
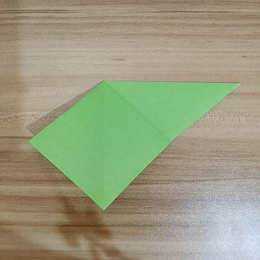
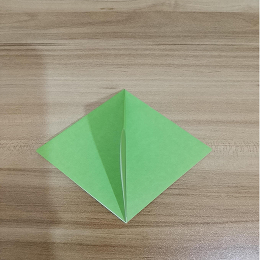
Fold the paper in half again from the left corner to the right corner.
紙を左の角から右の角に向かってもう一度半分に折ります。
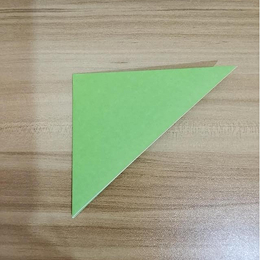
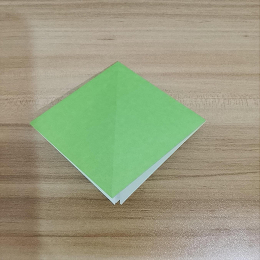
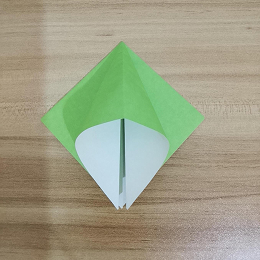
Perform a squash fold with the top flap. To do this, open the top flap and fold the right corner to the bottom corner while creasing the sides.
上のフラップでスクワッシュ折りを行います。やり方は、上のフラップを開き、右の角を下の角に折り、両側に折り目をつけます。
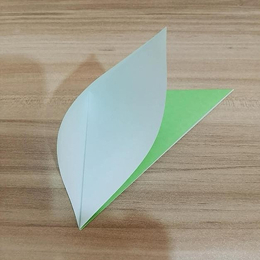
Turn over.
裏返します。
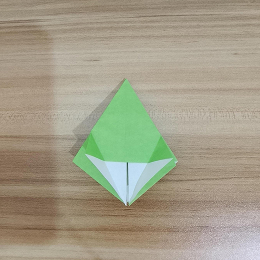
Perform another squash fold. To do this, make the left flap stand vertically, then open it up and squash it down.
もう一度スクワッシュ折りを行います。左のフラップを垂直に立て、開いて押しつぶします。


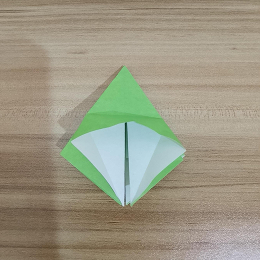
Open up a flap and perform a squash fold on it as well.
フラップを開き、それにもスクワッシュ折りを行います。

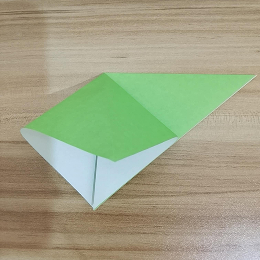
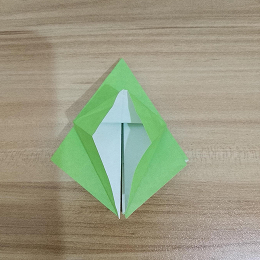
Perform this squash fold three more times on the other flaps until your figure looks exactly like this.
このスクワッシュ折りを他のフラップにもあと3回行い、形がちょうどこのようになるまで続けます。

From the bottom corner, fold the left and right sides inward to meet at the center.
下の角から、左右の辺を内側に折って中心で合わせます。

Unfold.
折り目を広げます。
Open the flap upwards so that the left and right sides can fold in and meet at the center. Once it looks like the third picture in this step, crease it well.
フラップを上に開き、左右の辺が内側に折れて中心で合わさるようにします。このステップの3枚目の写真のようになったら、しっかり折り目をつけます。
Repeat this three more times on the other sides until your figure looks like the picture.
これを他の辺にもあと3回繰り返し、形が写真のようになるまで行います。
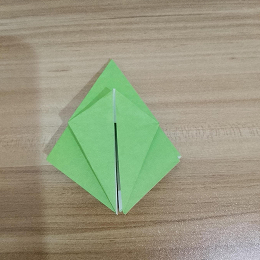
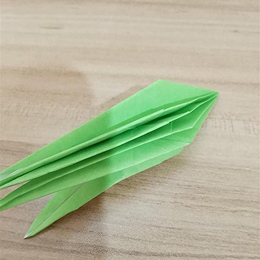
Take a layer from one side and fold it over to the other side to create a smooth edge.
片側の一枚の層を取り、もう片方に折り重ねて滑らかな側面を作ります。
From the bottom corner, fold the left and right sides inward to meet at the center.
下の角から、左右の辺を内側に折って中心で合わせます。
Take either the left or right side and fold a flap over to create another smooth side, then repeat Step 14.
左側か右側のどちらかの一枚を折り重ねてもう一方の滑らかな面を作り、ステップ14を繰り返します。

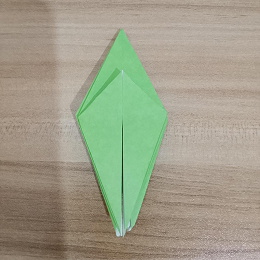
Take either the left or right side and fold a flap over until you achieve this side. (See close-up)
左側か右側のどちらかの一枚を折り重ねて、この面になるまで折ります。(拡大図を参照)

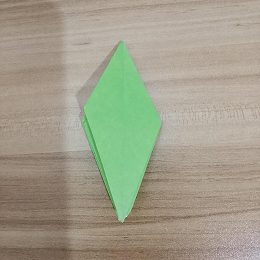
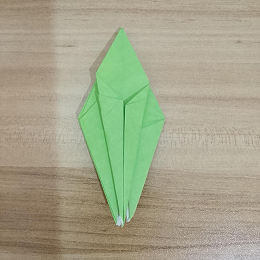
Time to balance out the layers. Make sure there are four layers on each side of the figure.
層を均等に整える時間です。形の両側にそれぞれ4枚の層があることを確認してください。
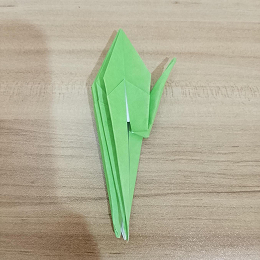
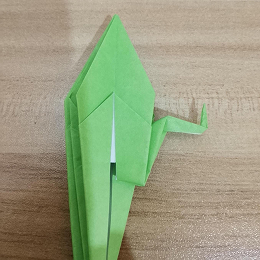
Let’s work on the legs. Take the pointy flap on the right side and perform an inside reverse fold upwards.
脚を作りましょう。右側の尖ったフラップを取り、内側逆折りで上向きに折ります。
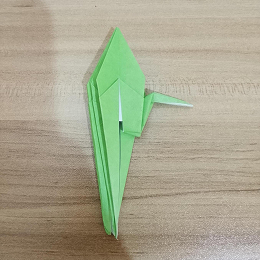
Grab a portion of the leg and perform another inside reverse fold pointing outwards.
脚の一部をつかみ、外向きに向かうようにもう一度内側逆折りを行います。
Grab a small portion of the leg and perform another inside reverse fold upwards.
脚の小さな部分をつかみ、上向きにもう一度内側逆折りを行います。
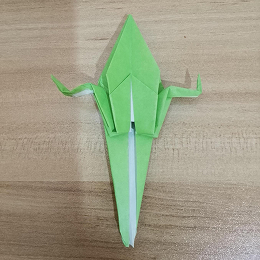
Repeat Steps 18–20 on the left side.
ステップ18〜20を左側でも繰り返します。
For the rear legs, perform an inside reverse fold pointing outward on both legs.
後ろ脚は、両方の脚で外向きの内側逆折りを行います。
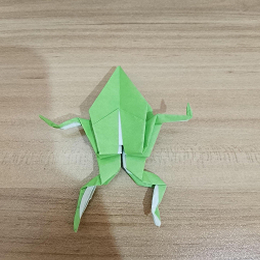
Perform another inside reverse fold, pointing the legs downward.
脚を下向きにするように、もう一度内側逆折りを行います。
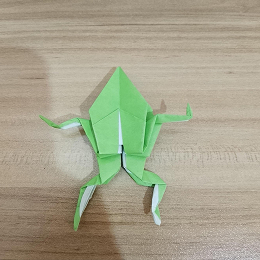
Take a small portion of the leg and perform another inside reverse fold pointing outward.
脚の小さな部分をつかみ、外向きにもう一度内側逆折りを行います。
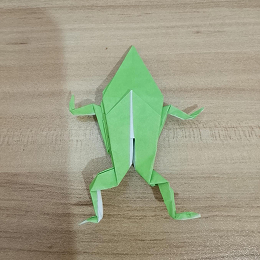
There is a small hole behind the frog. Blow into the hole, and the body and head will puff up.
カエルの後ろに小さな穴があります。穴に息を吹き込むと、体と頭が膨らみます。


