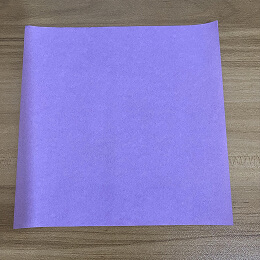
Start with a square piece of origami paper. I am using a 7×7-inch sheet of origami paper.
正方形の折り紙を用意します。私は7×7インチの折り紙を使っています。
Start with a square piece of origami paper. I am using a 7×7-inch sheet of origami paper.
正方形の折り紙を用意します。私は7×7インチの折り紙を使っています。
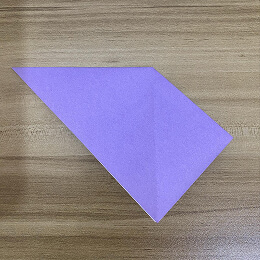
Rotate the paper so it forms a diamond shape. If you are using two-sided colored origami paper, place the lighter side facing up.
紙をひし形になるように回します。両面に色のついた折り紙を使う場合は、明るい色の面を上に向けてください。

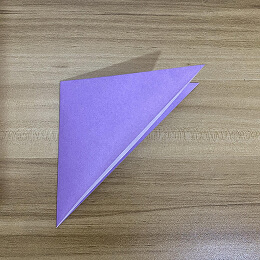
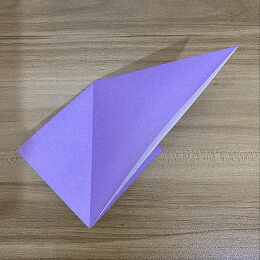
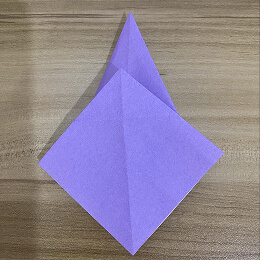
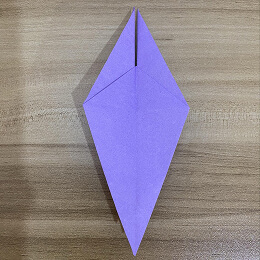
Fold the paper in half by bringing the top corner down to meet the bottom corner.
紙を半分に折ります。上の角を下の角に合わせて折ってください。

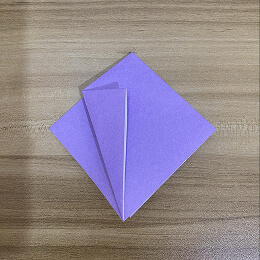
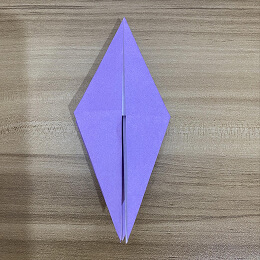
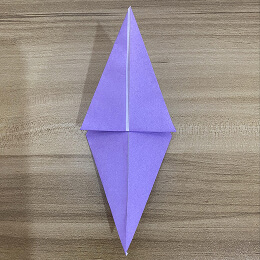
Once again, fold the paper in half by bringing the left corner over to the right corner.
もう一度、紙を半分に折ります。左の角を右の角に合わせて折ってください。
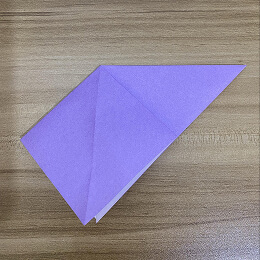
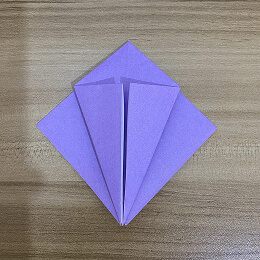
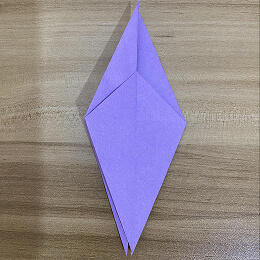
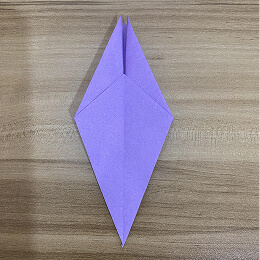
Take the top flap and open it.
上のはじを持ち上げて開きます。

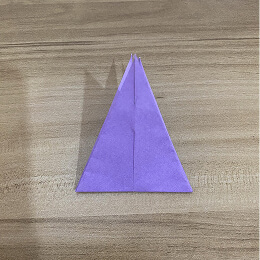
Crease the left and right sides so that you can fold the top corner down to the bottom corner.
左右の辺に折り目をつけ、上の角を下の角に折れるようにします。

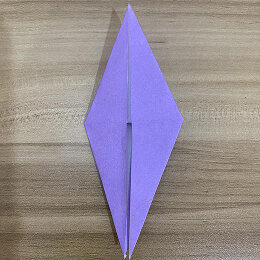
Flatten the fold firmly.
折り目をしっかりと押さえて平らにします。
Flip the paper over.
紙を裏返します。
Lift the left flap up so that it stands vertically.
左のはじを持ち上げて、垂直に立たせます。
Repeat Step 7 on this side as well.
この面でもステップ7を繰り返します。

Fold the left corner from the bottom up to meet the center.
左下の角を折り上げて、中央に合わせます。
Fold the right corner from the bottom up to meet the center.
右下の角を折り上げて、中央に合わせます。
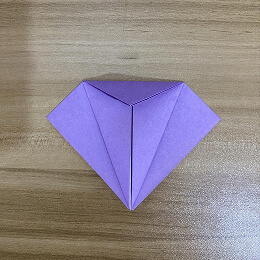
Fold the top triangle down.
上の三角を下に折ります。
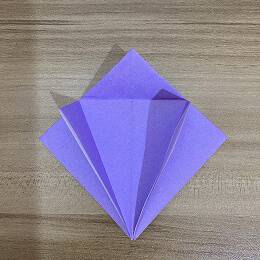
Now unfold the triangle back up, along with the left and right flaps.
次に、上の三角と左右のはじを元に戻して開きます。
Take the bottom corner of the top layer.
上の層の下の角を持ちます。
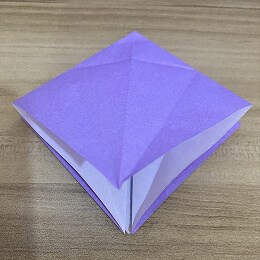
Open the flap all the way. Using the creases as guides, fold the left and right sides in toward the center.
はじを完全に開きます。折り目をガイドにして、左右の辺を中央に向かって折ります。
Flatten the fold firmly.
折り目をしっかりと押さえて平らにします。

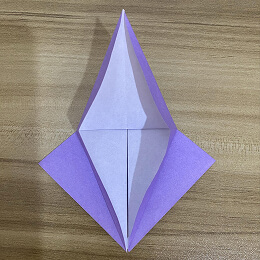
Turn the figure over.
作品を裏返します。
Repeat the same steps on this side as well.
この面でも同じ手順を繰り返します。
Take the top layer from the right side and fold it over to the left.
右側の上の層を取り、左側に折ります。
Turn the figure over.
作品を裏返します。
Fold the right flap over to the left, and you should have this shape.
右のはじを左に折ると、この形になります。
Take the bottom corner of the top layer and fold it upward.
上の層の下の角を持ち上げて折ります。
Turn the figure over.
作品を裏返します。
Take the bottom corner of the top layer and fold it upward.
上の層の下の角を持ち上げて折ります。
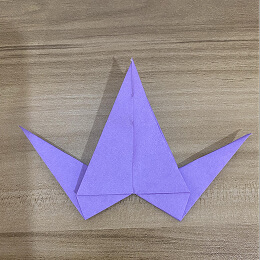
Take the two inner wedges and pull them out, then crease the base below so the wedges stay in that position.
内側の2つのくさび形を引き出し、下の部分に折り目をつけて、くさび形がその位置に固定されるようにします。
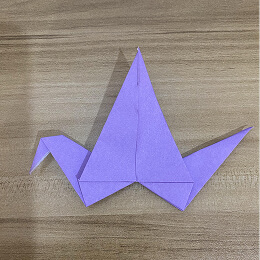
Take the left wedge and open it slightly so that you can bend a portion of it down to form the head.
左のくさび形を少し開き、頭を作るために一部を下に折ります。
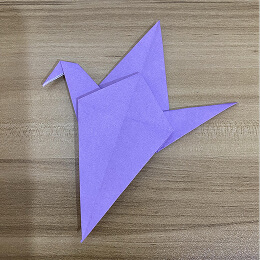
Hold the chest of the bird, including a small part of the wing, and fold the rest of the wing downward.
鳥の胸の部分と、羽の一部を持ち、残りの羽を下に折ります。
Flip the model over.
作品を裏返します。
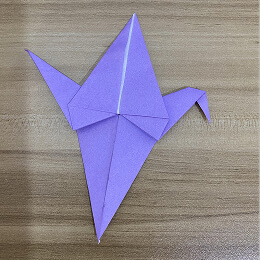
Repeat Step 26 on this side as well.
この面でもステップ26を繰り返します。
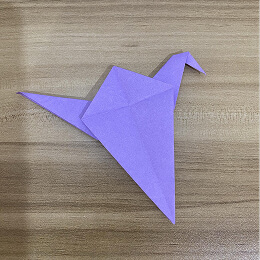
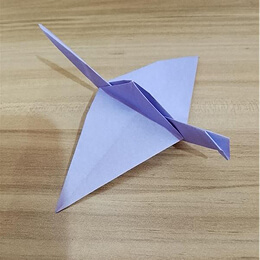
Once the wing can stay in that position, pull the tail, and the bird will come alive!
羽がその位置で固定できたら、尾を引くと鳥が羽ばたきます!