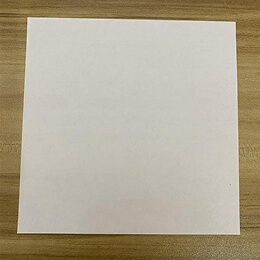
Start with a square piece of origami paper. I am using a 7×7 inch origami paper.
正方形の折り紙から始めます。私は7×7インチの折り紙を使っています。
Start with a square piece of origami paper. I am using a 7×7 inch origami paper.
正方形の折り紙から始めます。私は7×7インチの折り紙を使っています。
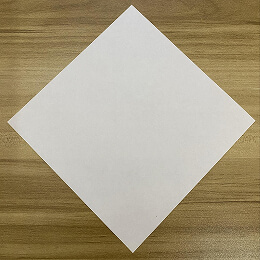
Rotate the paper diagonally.
紙を斜めに回します。
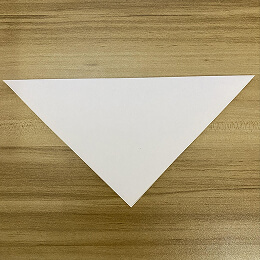
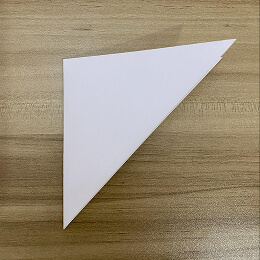
Fold the paper in half by bringing the top corner down to the bottom corner.
上の角を下の角に合わせて、紙を半分に折ります。
To make a crease in the middle, fold the paper in half again by bringing the left corner to the right corner.
真ん中に折り筋をつけるために、左の角を右の角に合わせてもう一度半分に折ります。
Unfold.
開きます。
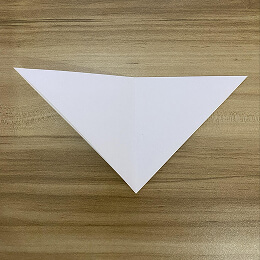
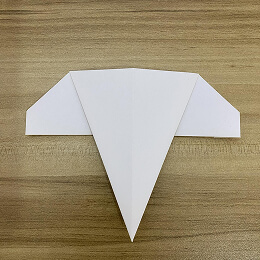
Fold the left edge of the triangle to the center crease.
三角形の左の辺を中央の折り筋に合わせて折ります。
Fold the right edge of the triangle to the center crease.
三角形の右の辺を中央の折り筋に合わせて折ります。
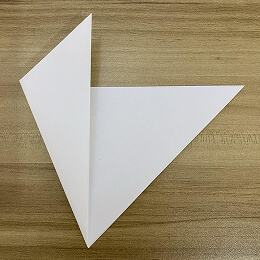
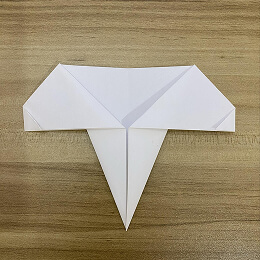
Fold the top left corner to the side.
左上の角を横に折ります。
Fold the top right corner to the side.
右上の角を横に折ります。

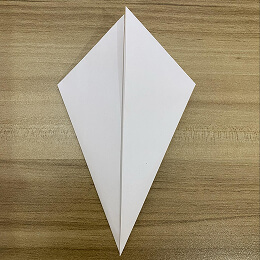
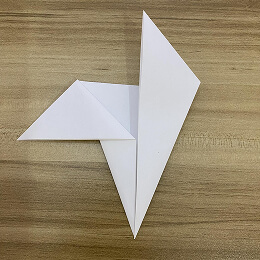
Fold the left and right corners inward like this.
左と右の角をこのように内側に折ります。
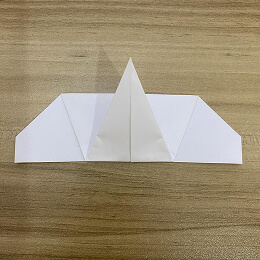
Turn the figure over.
図を裏返します。
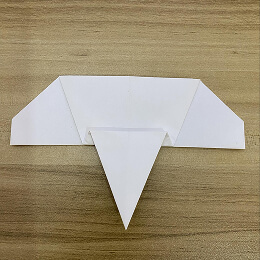
Fold up the elephant’s trunk.
ゾウの鼻を折り上げます。
Fold the back down like this.
後ろをこのように折り下げます。
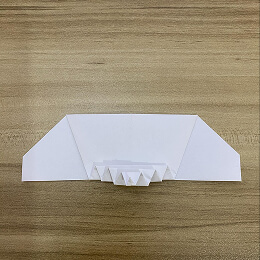
Keep folding the trunk up and down like an accordion.
鼻をアコーディオンのように上下に折り続けます。
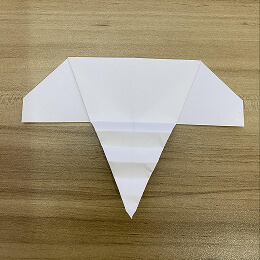
Pull out the elephant’s trunk.
ゾウの鼻を引き出します。
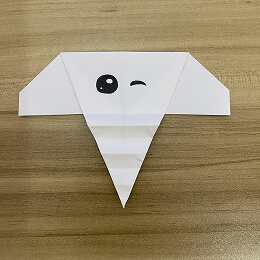
Add some eyes to make it look cuter. And here you have your very own paper elephant!
目を描いてもっと可愛くします。これで、あなただけの折り紙のゾウの完成です!