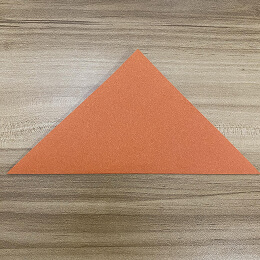
Start with a square sheet of origami paper. I am using a 7×7 inch origami paper.
正方形の折り紙を用意します。私は7×7インチの折り紙を使っています。
Start with a square sheet of origami paper. I am using a 7×7 inch origami paper.
正方形の折り紙を用意します。私は7×7インチの折り紙を使っています。

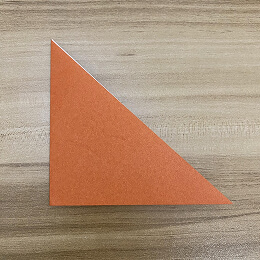
Fold the paper in half by folding the bottom corner to the top corner.
下の角を上の角に合わせて折り、紙を半分に折ります。
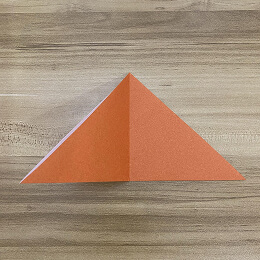
Create a crease in the middle. Then fold the paper in half again by folding the left corner to the right corner.
真ん中に折り目をつけます。次に、左の角を右の角に合わせてもう一度半分に折ります。
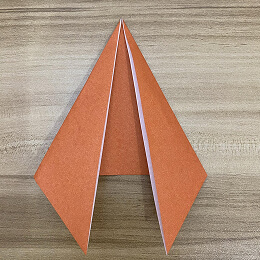
Unfold.
折り目を戻します。
Now fold the left edge of the triangle toward the center crease, but not directly on the crease. Leave a small gap.
次に、三角形の左の端を中心の折り目に向けて折りますが、折り目にぴったり合わせず、少し隙間をあけてください。

Fold the right edge of the triangle toward the center crease, but not directly on the crease. Leave a small gap.
三角形の右の端を中心の折り目に向けて折りますが、折り目にぴったり合わせず、少し隙間をあけてください。
Fold the top down by approximately this much.
上をだいたいこれくらいの幅で折り下げます。
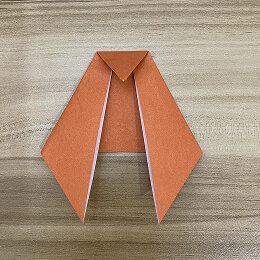
Fold in the edge of the left bottom flap like this.
左下のフラップの端をこのように内側に折ります。
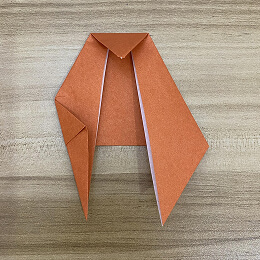
Now fold in the edge of the right bottom flap like this.
次に、右下のフラップの端をこのように内側に折ります。

Turn the figure over.
形を裏返します。

Draw the face, and you are done!
顔を描いて、完成です!


