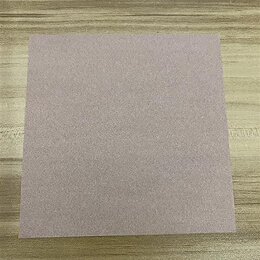
Start with a square piece of origami paper, color side up. A 7×7 inch piece of origami paper is fine.
色のついた面を上にして、正方形の折り紙を用意します。7×7インチの折り紙で大丈夫です。
Start with a square piece of origami paper, color side up. A 7×7 inch piece of origami paper is fine.
色のついた面を上にして、正方形の折り紙を用意します。7×7インチの折り紙で大丈夫です。
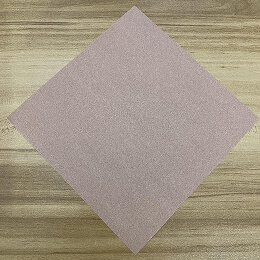
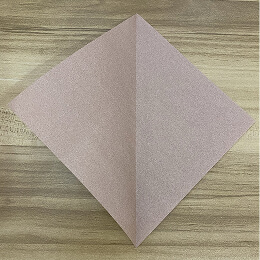
Rotate the paper diagonally.
紙を斜めに回転させます。
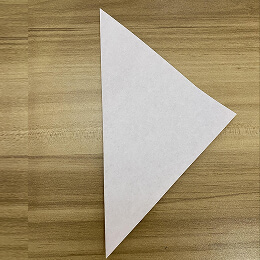
Fold the left half to the right.
左半分を右側に折ります。
Now unfold.
次に、折り目を戻します。
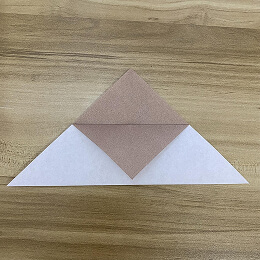
Fold the bottom half to the top.
下半分を上側に折ります。

Fold the top triangular corner down to the bottom edge.
上の三角の角を下の端に向けて折ります。
Turn the paper over.
紙を裏返します。
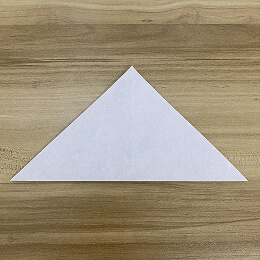
Fold the top corner down to the bottom edge.
上の角を下の端に向けて折ります。

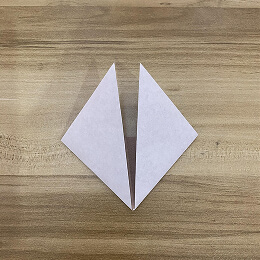
Fold the right side up diagonally toward the center.
右側を中心に向かって斜め上に折ります。
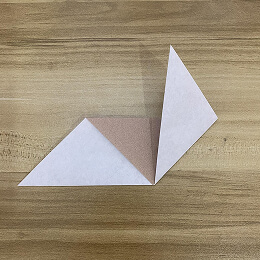
Fold the left side similarly.
左側も同じように折ります。
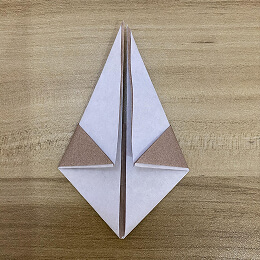
Fold the top left edge to the center.
左上の端を中心に折ります。

Fold the top right edge to the center.
右上の端を中心に折ります。
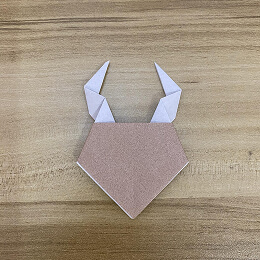
Fold the left antler back diagonally, as shown in the picture.
左のツノを写真のように斜めに折り返します。
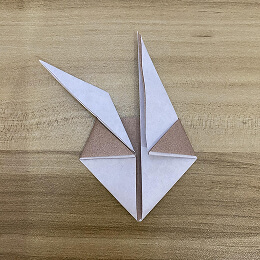
Now fold the right antler back diagonally.
次に、右のツノを斜めに折り返します。
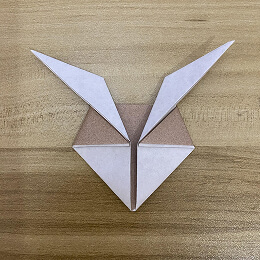
Fold a small part of the antlers upward.
ツノの一部を少し上に折ります。
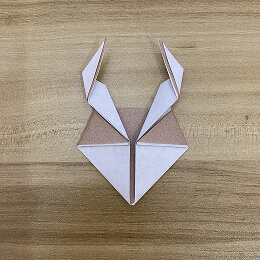
Turn the paper over.
紙を裏返します。
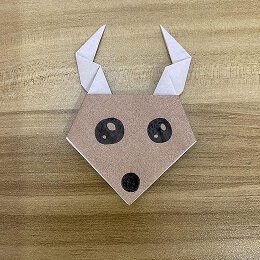
Draw the eyes and nose, and here you have a cute paper reindeer!
目と鼻を描いて、かわいい紙のトナカイの完成です!