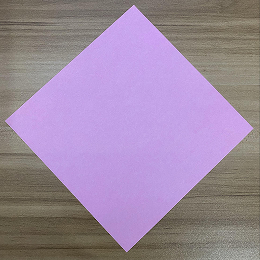
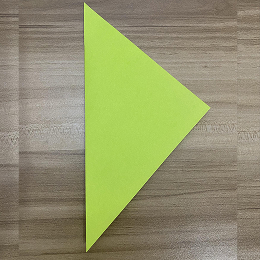
Begin with a square sheet of origami paper. I am using a 7×7 inch sheet of origami paper.
最初に、折り紙用の正方形の紙を用意します。私は7×7インチの折り紙を使っています。
Begin with a square sheet of origami paper. I am using a 7×7 inch sheet of origami paper.
最初に、折り紙用の正方形の紙を用意します。私は7×7インチの折り紙を使っています。

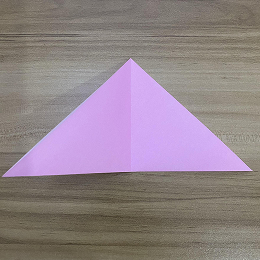
Rotate it so it looks like a diamond.
それをひし形になるように回転させます。
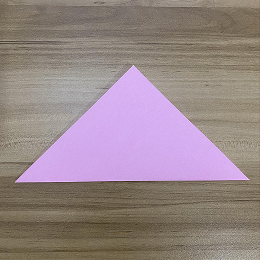
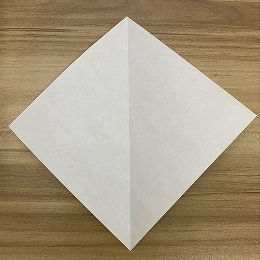
Fold the paper in half by bringing the bottom corner up to the top corner.
下の角を上の角に合わせて、紙を半分に折ります。
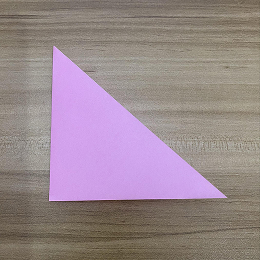
Fold it in half again by bringing the left corner over to the right corner.
左の角を右の角に合わせて、もう一度半分に折ります。
Unfold it.
それを開きます。
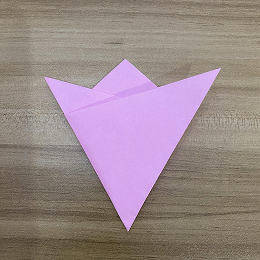
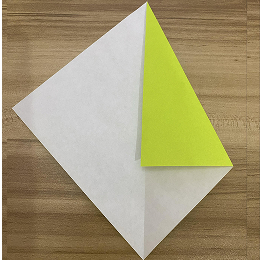
Take the right corner and make a diagonal fold upwards, as shown in the picture.
右の角を持って、写真のように斜め上に折ります。
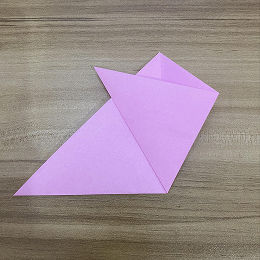
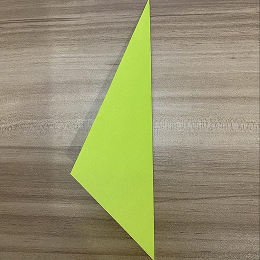
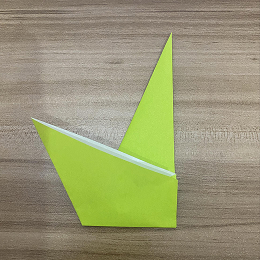
Take the left corner and wrap the flap around the rest of the figure, as shown in the picture.
左の角を持って、写真のように他の部分にフラップを巻きつけます。
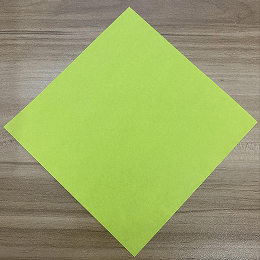
Now take out a new sheet of paper. We’re going to make the stem.
次に、新しい紙を用意します。これから茎を作ります。
Fold the paper in half from left to right.
紙を左から右へ半分に折ります。
Unfold it.
開きます。
Grab the right corner and fold it to the center, making sure the right edge meets the center crease.
右の角をつかんで中央に折り、右の端が中央の折り目に合うようにします。
Now grab the left corner and fold it to the center, making sure the left edge meets the center crease.
次に、左の角をつかんで中央に折り、左の端が中央の折り目に合うようにします。

Fold the figure in half by folding it from right to left.
図形を右から左へ半分に折ります。
Take a small portion of the bottom and fold it up, aligning the right edges. It should look like the picture.
下の一部分を少し折り上げて、右の端を揃えます。写真のような形になります。
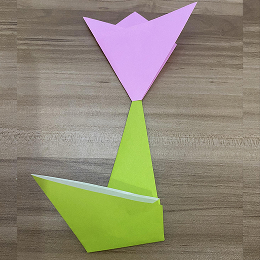
Tape the tulip to the top of the stem. Wasn’t that easy?
チューリップを茎の上にテープで貼ります。簡単でしたね?