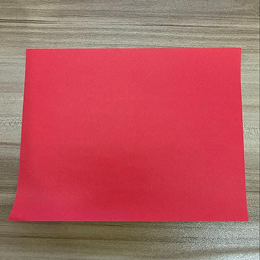
Start with a square piece of origami paper. I am using an 7x7 inches origami paper.
正方形の折り紙を用意します。私は 7×7 インチの折り紙を使っています。
Start with a square piece of origami paper. I am using an 7x7 inches origami paper.
正方形の折り紙を用意します。私は 7×7 インチの折り紙を使っています。
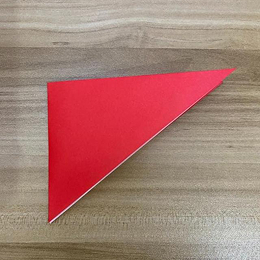
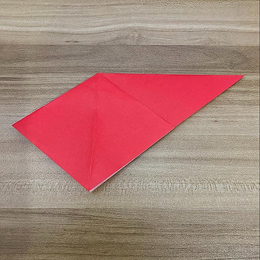
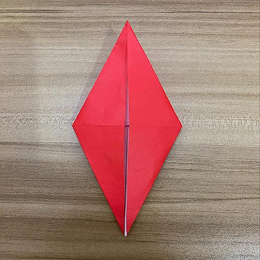
Face the lighter side up and fold the paper diagonally.
明るい面を上にして、紙を対角線に折ります。

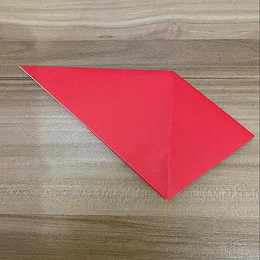
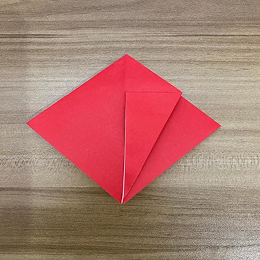
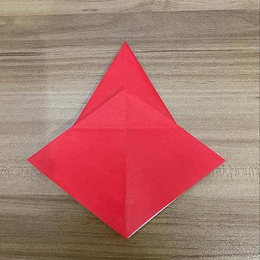
Fold the paper in half by taking the top corner and folding it down to the bottom corner.
上の角を下の角に合わせて、紙を半分に折ります。

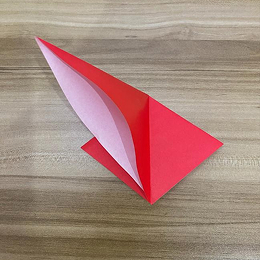
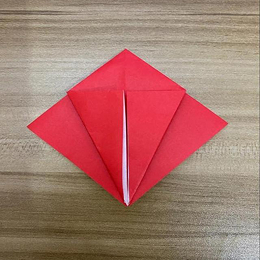
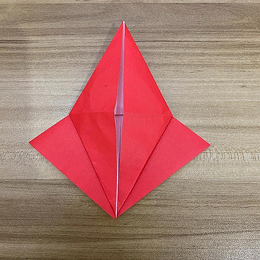
Fold the triangle in half by taking the left corner and folding it over to the right corner.
左の角を右の角に合わせて、三角形を半分に折ります。
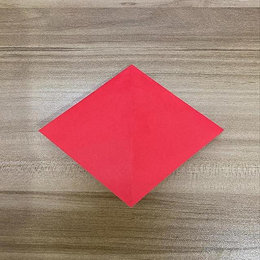
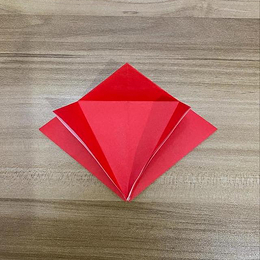
Take the top flap and open it.
上のふた(または「フラップ」)を持ち上げて開きます。
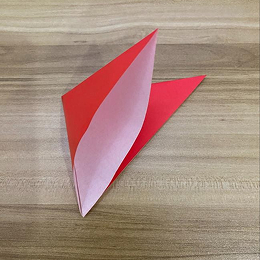
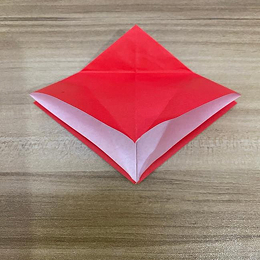
Crease the top corner to shape the top flap diagonally.
上の角に折り目をつけて、上のフラップを斜めの形にします。
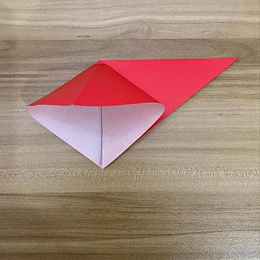
Crease the left and right sides so you can fold the top corner down to the bottom.
左右の端に折り目をつけて、上の角を下に折りたたみます。
Now we ’ ll turn the paper over and do the same thing on this side.
それでは、紙を裏返して、この面にも同じことをしましょう。
Take the top flap and open it.
上のフラップ(ふた)を取って開いてください。
Crease the left and right sides so you can fold the top corner down to the bottom corner.
上の角を下の角に折れるように、左右の端に折り目をつけてください。
Take the right side of the top layer and fold it to the center.
上の層の右側を取って、中央に向かって折ってください。
Take the left side of the top layer and fold it to the center.
上の層の左側を取って、中央に向かって折ってください。
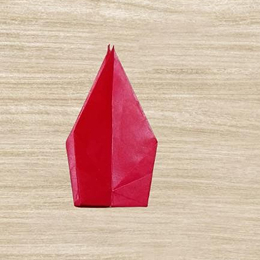
Fold down the top triangle as shown.
図のように上の三角形を折り下げてください。

Unfold.
開いてください。
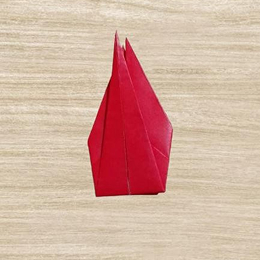
Open the top flap.
上のふた(フラップ)を開いてください。
Lift the top flap upwards and crease the left and right sides.
上のフラップを上に持ち上げて、左右の端に折り目をつけてください。
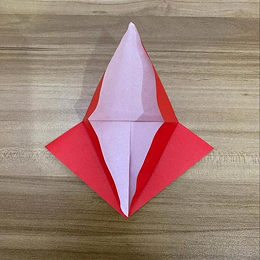
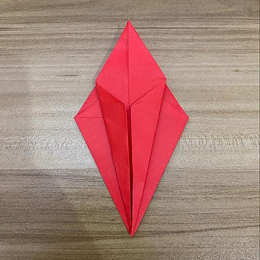
Flatten the left and right sides well.
左右の端をしっかりと押さえて平らにしてください。
Turn the figure over.
図を裏返してください。
Repeat steps 15, 16, and 17 on this side as well.
この面でも、15、16、17 の手順を繰り返してください。
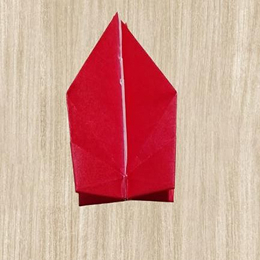
Take the upper layer on both sides and fold the lower parts toward the center as shown in the picture.
両側の上の層を取り、下の部分を図のように中央に向かって折ってください。
Turn the figure over.
図を裏返してください。
Repeat step 20 on this side as well.
この面でもステップ 20 を繰り返してください。

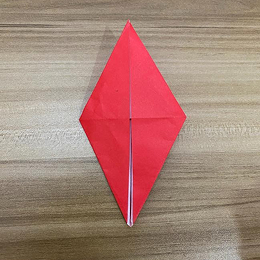
Take the left flap and fold it over to the right.
左のフラップを取って右に折り返してください。
Turn the figure over.
図を裏返してください。
Take the left flap and fold it over to the right.
左のフラップを取って右に折り返してください。
Take the bottom flap and fold it upward to the top.
下のフラップを取って、上に折り上げてください。
Turn the figure over.
図を裏返してください。
Take the bottom flap and fold it over to the top again.
もう一度、下のフラップを取って上に折り上げてください。
Take the top layer of the right flap and fold it over to the left.
右のフラップの上の層を取って、左に折りたたんでください。
Turn the figure over.
図を裏返してください。
Take the top layer of the right flap and fold it over to the left.
右のフラップの上の層を取って、左に折ってください。
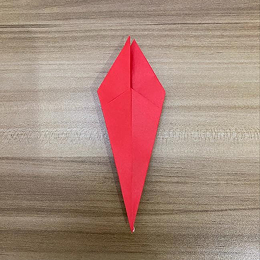
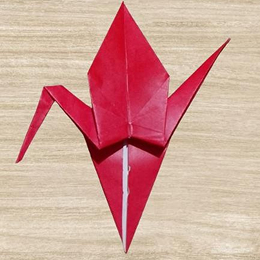
Take the left and right pieces underneath the top flap and pull them apart.
上のフラップの下にある左右の部分を持って、引き離してください。
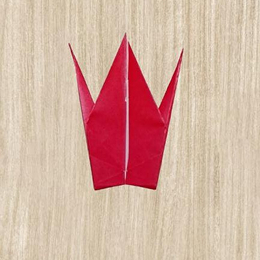
Crease the bottom of those pieces so that they ’ ll stay spread apart.
それらの部分の下をしっかり折って、広がったままにしてくださ
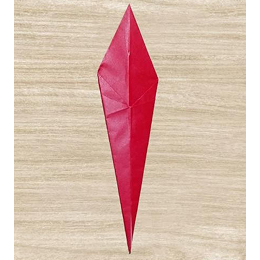
Take one of those pieces that you pulled apart, and slightly open the top corner.
引き離した部分のうちの一つを取り、上の角を少し開いてください。
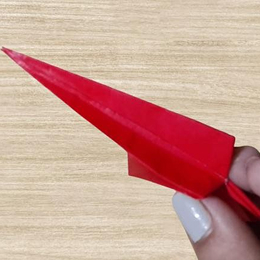
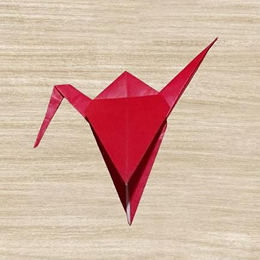
Bend a portion of it down to form the head.
それの一部を下に曲げて、頭を作ってください

Crease the sides of the head up so the piece will stay bent.
頭の両側を上に折って、形が保たれるようにしてください。
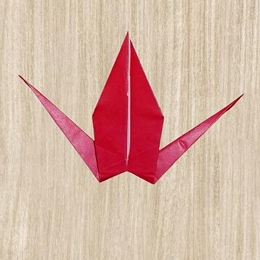
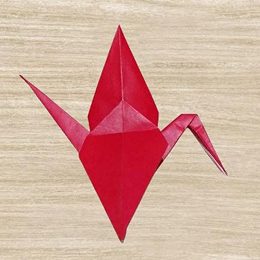
Now the crane should look like this.
これで鶴はこのような形になっているはずです。
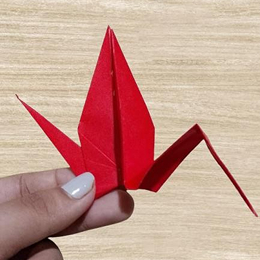
Bend the wing down at a 90-degree angle.
羽を 90 度の角度で下に曲げてください。
Turn the figure over.
図を裏返してください。
Bend the wing down at a 90-degree angle.
羽を 90 度の角度で下に折ってください。
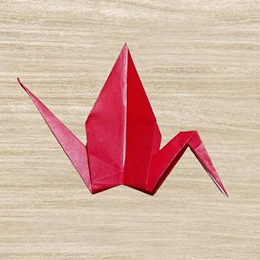
Voila! You made a beautiful origami crane!
じゃじゃーん!美しい折り鶴が完成しました!


