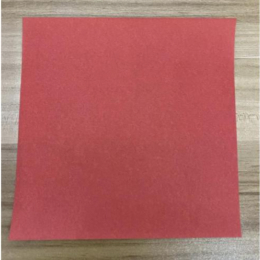
Begin with a square sheet of paper. I'm using a 7×7 inch piece of origami paper.
正方形の紙から始めます。私は7×7インチの折り紙を使っています。
Begin with a square sheet of paper. I'm using a 7×7 inch piece of origami paper.
正方形の紙から始めます。私は7×7インチの折り紙を使っています。
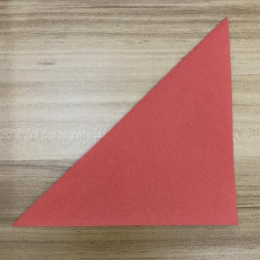
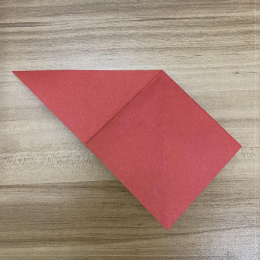
Fold the paper diagonally from the top left corner to the bottom right corner.
紙を左上の角から右下の角に向かって斜めに折ります。
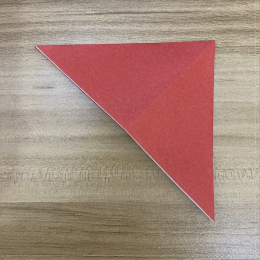
Now fold the paper diagonally again, this time from the top right corner to the bottom left corner.
今度は、右上の角から左下の角に向かって斜めに折ります。

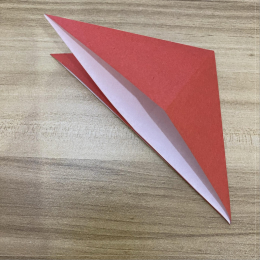
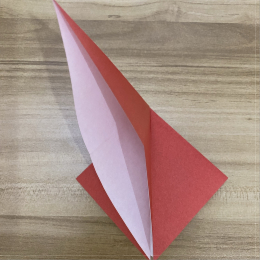
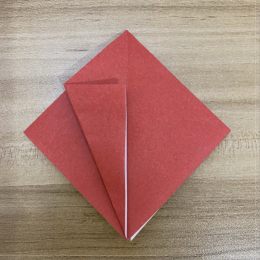
Now unfold the model. Using scissors, cut only the top layer straight down the center, stopping at the top crease. Be careful not to cut through any other layers.
次に、モデルを開きます。ハサミを使って、上の層だけを中央に沿って上の折り目までまっすぐに切ります。他の部分を切らないように注意してください
Squash fold the top layer. To do this, first open up the top layer.
上の層をつぶすように折ります。そのために、まず上の層を開きます。
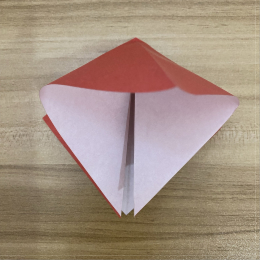
Now fold it downward while making creases along the sides.
今度は、両側に折り目をつけながら下に折ります。

Flip the model to the other side.
モデルを裏返します。
Next, squash fold the opposite flap. To do this, lift the left flap so it stands upright.
次に、反対側のフラップをつぶし折りします。そのために、左側のフラップを垂直に立てます。
After that, open the top flap as demonstrated.
その後、図のように上のフラップを開きます。
Now, flatten it by pressing down.
今、それを押しつぶして平らにします。
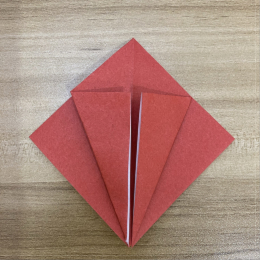
Fold the left part of the top layer toward the center.
上の層の左側を中央に向かって折ります。
Fold the right part of the top layer inward to the center.
上の層の右側を中央に向かって折ります。
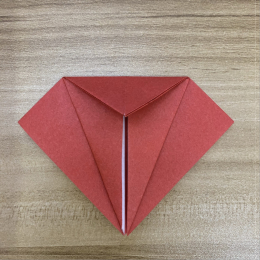
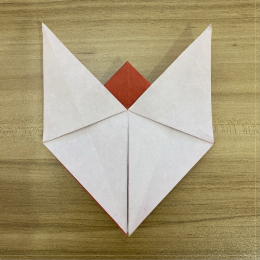
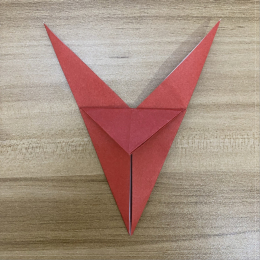
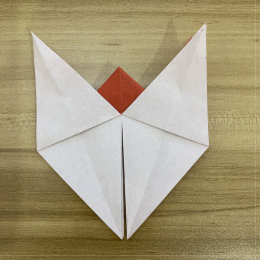
Unfold both sides, then fold down the top corner.
両側を開いてから、上の角を下に折ります。
Now unfold the model. Using scissors, cut only the top layer straight down the center, stopping at the top crease. Be careful not to cut through any other layers.
次に、モデルを開きます。ハサミを使って、上の層だけを中央に沿って上の折り目までまっすぐに切ります。他の部分を切らないように注意してください。
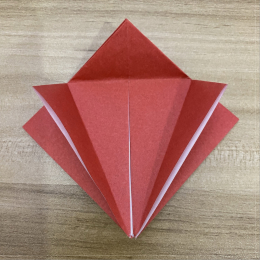
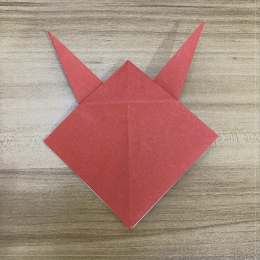
Lift and fold the flaps you just cut upward, as shown in the picture.
先ほど切ったフラップを、図のように上に折り上げます。
Fold the left side inward along the crease toward the center.
左側を折り目に沿って中央に向かって折ります。

Fold the right side inward along the crease toward the center.
右側を折り目に沿って中央に向かって折ります。

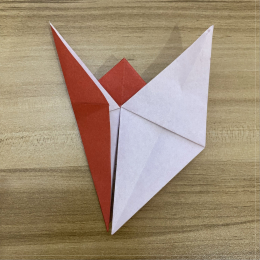
Flip the model to the other side.
モデルを反対側に裏返します。
Bring the left side inward along the crease toward the center.
左側を折り目に沿って内側に折り、中央に合わせます。
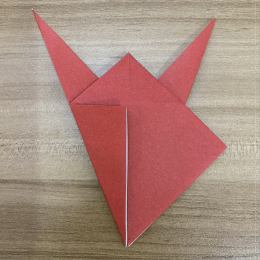
Bring the right side inward along the crease so it meets the center.
右側を折り目に沿って内側に折り、中央に合わせます。
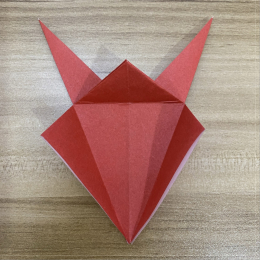
Fold the top section downward.
上の部分を下に折ります。
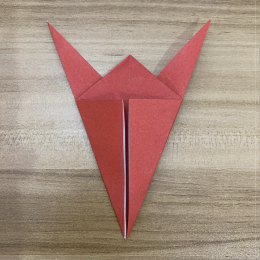
Unfold the top and side flaps. As before, cut straight down the center of the top layer, stopping at the crease. Be careful not to cut any layers beneath.
上と両側のフラップを開きます。前と同じように、上の層の中央を折り目までまっすぐ切ります。下の層を切らないように注意してください。
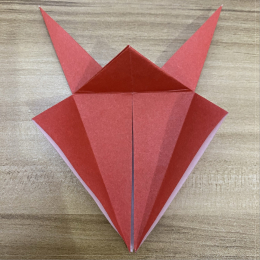
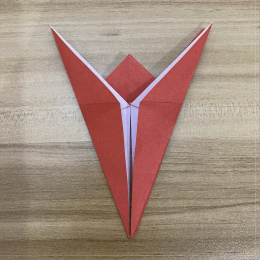
Fold the right flap upward as you did earlier.
右のフラップを先ほどのように上に折ります。
Now, fold the left flap upward.
今度は左のフラップを上に折ります。
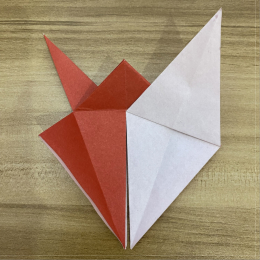
Fold the left flap inward along the crease toward the center.
左のフラップを折り目に沿って内側に折り、中央に合わせます。
Fold the right flap inward along the crease toward the center.
右のフラップを折り目に沿って内側に折り、中央に合わせます。
Turn the model upside down.
モデルを上下逆さまにします。
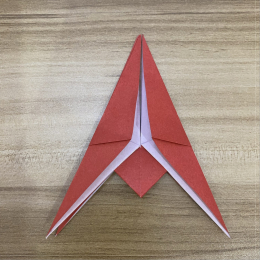
Fold the top left corner as illustrated.
図のように左上の角を折ります。
Unfold.
開く。

Next, shape the head using an inside reverse fold. Slightly open the left tip so you can fold a small part of it downward.
次に、内側逆折りで頭を作ります。左の先端を少し開いて、小さな部分を下に折り曲げられるようにします。
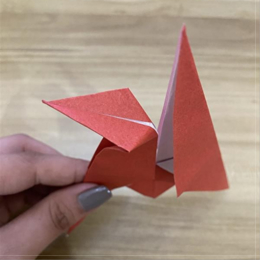
Now fold the tip inward and make creases along the sides.
今度は先端を内側に折り、両側に折り目をつけます。
Fold the tail downward as illustrated.
図のように尾を下に折ります。
Unfold.
開く。
Perform an inside reverse fold on the tail. First, open the tail to prepare for the fold.
尾を内側逆折りにします。そのために、まず尾を開きます。
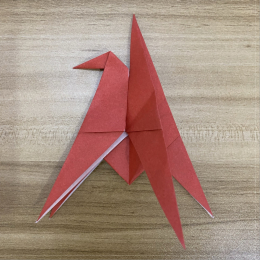
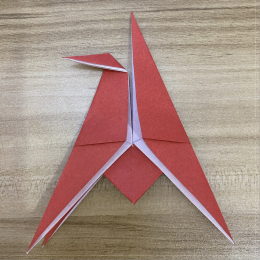
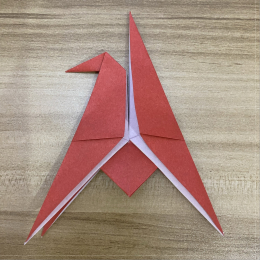
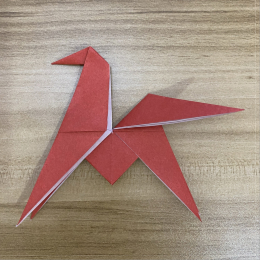
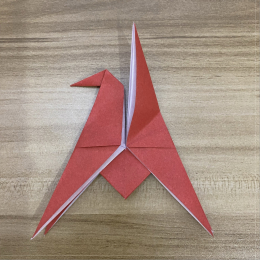
Now fold down along the crease, then press the folds firmly. Here you go, it’s complete.
今度は折り目に沿って下に折り、しっかり折り目をつけます。はい、これで完成です。


