Start with a square piece of origami paper. I am using a 7×7-inch sheet of origami paper
正方形の折り紙を用意します。私は7×7インチの折り紙を使っています。
Start with a square piece of origami paper. I am using a 7×7-inch sheet of origami paper
正方形の折り紙を用意します。私は7×7インチの折り紙を使っています。
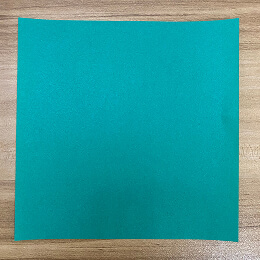
If you are using a two-colored origami paper, place the lighter side facing up.
両面に色がある折り紙を使う場合は、明るい色の面を上に向けてください。
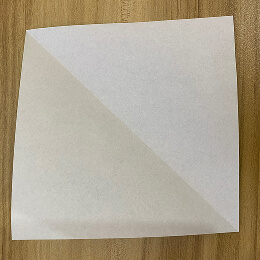
Fold the paper in half by bringing the upper left corner to the lower right corner.
左上の角を右下の角に合わせて折り、紙を半分に折ります。

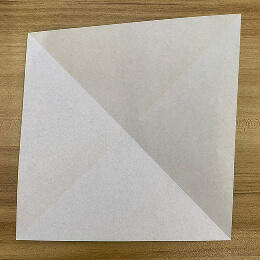
Unfold the paper. You now have a diagonal crease.
折り紙を開きます。対角線の折り目ができています。
Fold the paper in half again by bringing the upper right corner to the lower left corner.
右上の角を左下の角に合わせて折り、再び半分に折ります。
Unfold.
開きます。
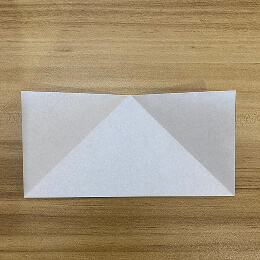
Fold the paper in half again by bringing the top half backward.
上半分を後ろに折って、再び半分に折ります。
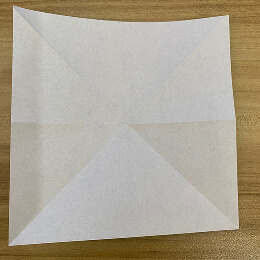
Unfold.
開きます。
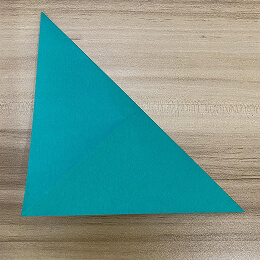
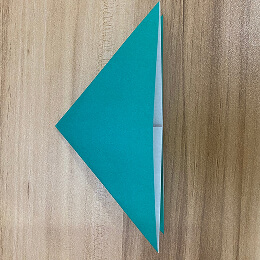
Bring the left and right creases together to form a triangle.
左右の折り目を合わせて三角形を作ります。

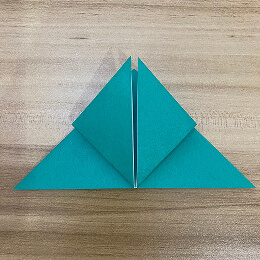
Fold the left and right corners of the top layer to the top corner of the triangle.
上の層の左角と右角を三角形の上の角に折ります。
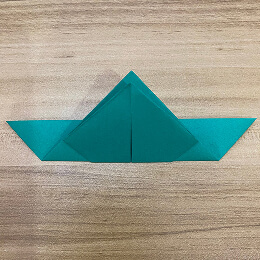
Turn the model over.
モデルを裏返します。
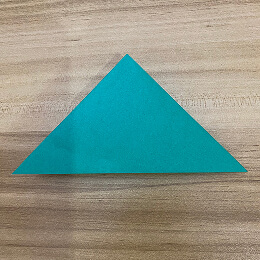
Fold the bottom part of the triangle upward, leaving a portion of the top corner visible, as shown in the picture.
三角形の下の部分を上に折り、上の角の一部が見えるようにします。(写真のように)
Turn the model over.
モデルを裏返します。
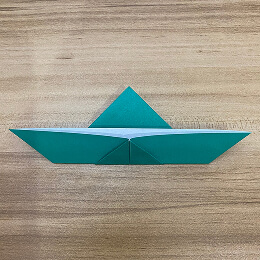
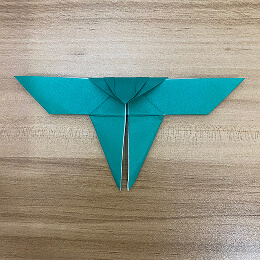
Pull down the left flap of the triangle, causing the side to bend inward. Fold and flatten the side down.
三角形の左のフラップを引き下げると、側面が内側に折れます。折りたたんで平らにします。
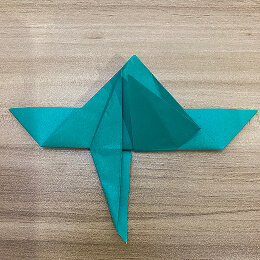
Like before, pull down the right flap and fold the side inward.
先ほどと同様に、右のフラップを引き下げて側面を内側に折ります。
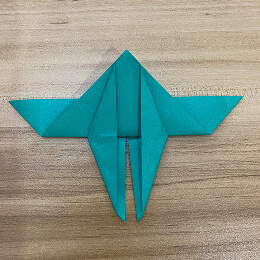
Turn the model over.
モデルを裏返します。
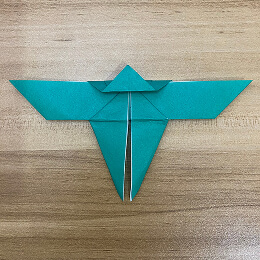
Fold down the top triangle.
上の三角形を折り下げます。
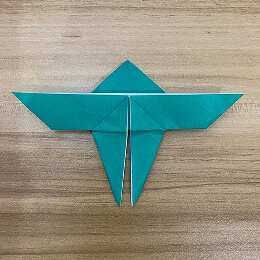
Fold a good portion of the triangle back up, but leave some parts folded down.
三角形の大部分を折り上げますが、一部は折り下げたままにします。
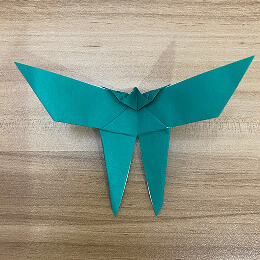
Slightly push the flaps together, and now you have a very cute origami butterfly ready to fly.
フラップを軽く押し合わせると、とてもかわいい折り紙の蝶が完成します。