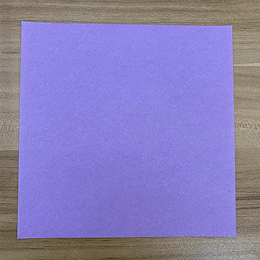
Start with a square piece of origami paper. I am using a 7×7 inch origami paper.
折り紙用の正方形の紙から始めます。私は7×7インチの折り紙を使っています。
Start with a square piece of origami paper. I am using a 7×7 inch origami paper.
折り紙用の正方形の紙から始めます。私は7×7インチの折り紙を使っています。
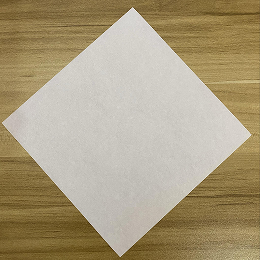
Face the lighter side upwards and fold the paper diagonally.
薄い色の面を上にして、紙を対角線に折ります。
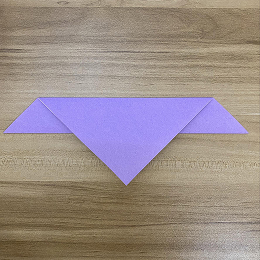
Fold the paper in half by folding the top corner to the bottom corner.
紙を半分に折ります。上の角を下の角に合わせて折ってください。

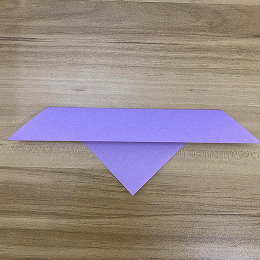
Fold part of the top down so that the edge is about halfway down. Don’t make this flap too thin because this will become the wings.
上の部分を半分くらいの位置まで折り下げます。この部分が翼になるので、あまり薄くしないでください。
Turn the paper over.
紙を裏返します。
Take the bottom corner of the top layer and fold it up like this.
上の層の下の角を持って、このように上に折り上げます。

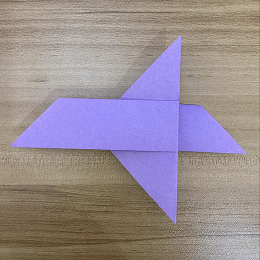
Fold the figure in half by folding the left side over to the right.
左側を右側に折って、形を半分に折ります。

Now fold that same flap back like this to make one of the wings.
次に、同じフラップをこのように後ろに折って、片方の翼を作ります。

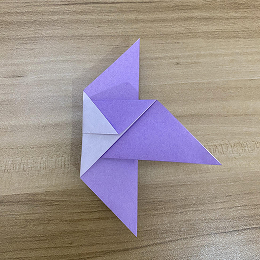
Turn the figure over.
形を裏返します。
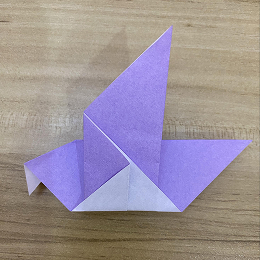
Fold the flap back like this to make the other wing.
このようにフラップを折り返して、もう片方の翼を作ります。
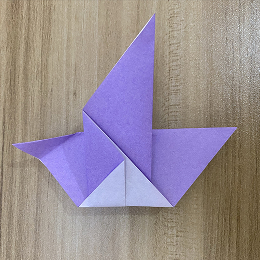
Fold the head as shown.
図のように頭を折ります。

Unfold.
折り目を戻します。
Open the flaps of the head.
頭のフラップを開きます。
Push the center of the head in and flatten. This is called an inside reverse fold.
頭の中心を内側に押し込み、平らにします。これは「内側逆折り」と呼ばれます。
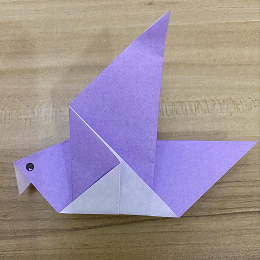
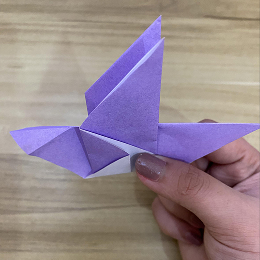
Draw the eyes and tada! Now set it free! Just kidding. Don’t throw it in the air. It will just fall down and you’ll be disappointed.
目を描いて、できあがり!さあ、自由にしてあげましょう!…冗談です。空中に投げないでください。ただ落ちてしまって、がっかりしますよ。