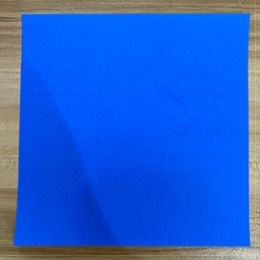
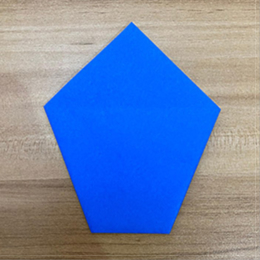
Start with a square sheet of origami paper. I am using a 7×7-inch sheet of origami paper.
正方形の折り紙を用意します。私は7×7インチの折り紙を使っています。
Start with a square sheet of origami paper. I am using a 7×7-inch sheet of origami paper.
正方形の折り紙を用意します。私は7×7インチの折り紙を使っています。
Rotate the paper diagonally. If you are using two-colored paper, place the lighter side facing upwards.
紙を対角線状に回転させます。両面が異なる色の折り紙を使う場合は、明るい色の面を上に向けてください。

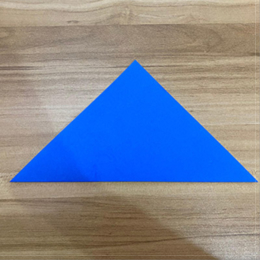
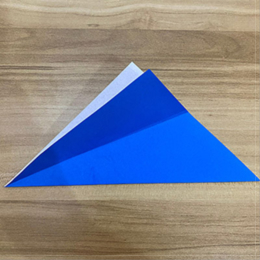
Fold the paper in half by bringing the bottom corner up to the top corner.
紙を半分に折ります。下の角を上の角に合わせるように折ってください。
Fold the left edge of the triangle down to align with the bottom edge.
三角形の左辺を下に折り、下辺に合わせてください。
We only need the crease line, so unfold the paper.
折り目だけが必要なので、紙を元に戻してください。
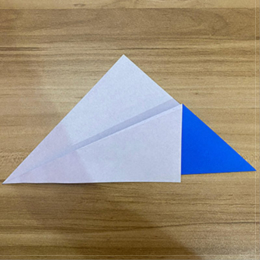
Fold the left corner of the triangle so that it meets the end of the crease line on the right.
三角形の左上の角を折り目の右端に合わせるように折ってください。
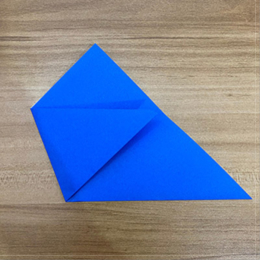
Fold the right corner over to the left corner.
右上の角を左上の角に合わせて折ってください。
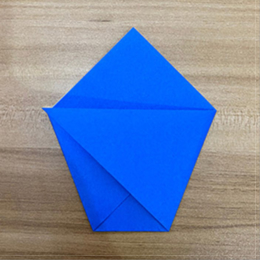
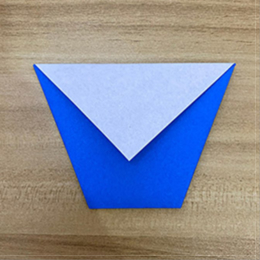
Fold the top flap downwards.
上のフラップを下に折ってください。
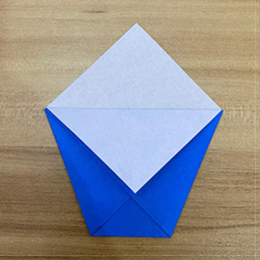
Turn the figure over.
図形を裏返してください。
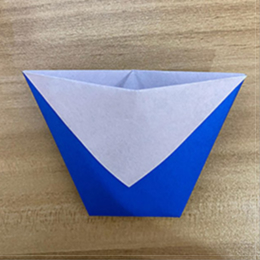
Again, fold the top flap downwards.
もう一度、上のフラップを下に折ってください。
After folding the top flap down, open the pocket.
上のフラップを折りたたんだ後、ポケットを開けてください。
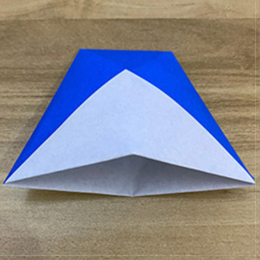
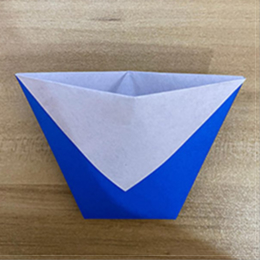
And finally, you now have an origami paper cup.
そして最後に、あなたは今、折り紙の紙コップを持っています。